Whitening Trays: How to Get Brighter Teeth Safely
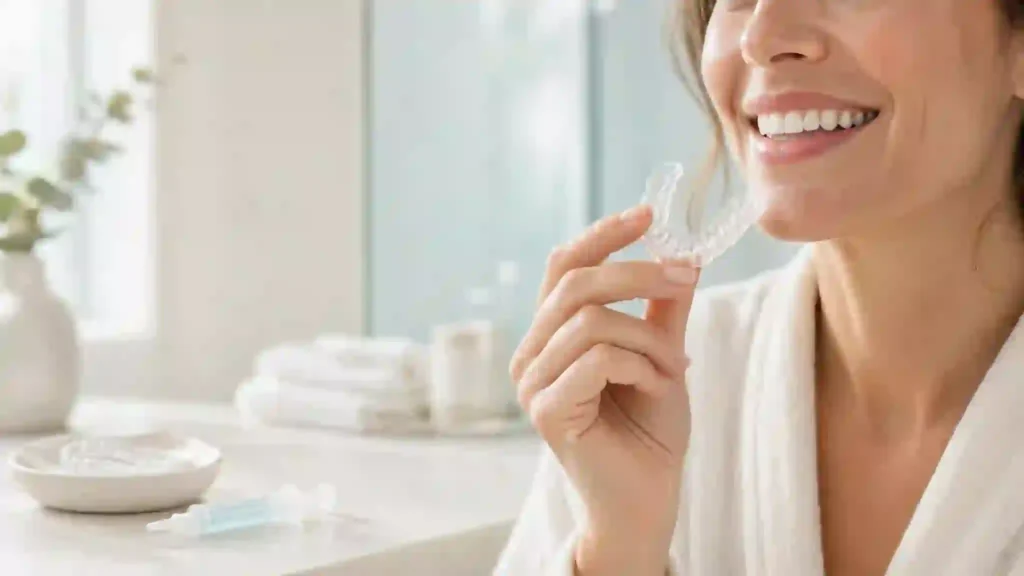
A yellow smile can make you hide in photos, even when you brush carefully. Coffee, tea, tobacco, aging, and certain medicines can change tooth color beyond what toothpaste can lift. Whitening trays offer a measured way to place bleaching gel on natural teeth, but poor fit, too much gel, or untreated dental problems can turn a simple plan into sore gums and patchy color. This guide shows a safer path.
What are whitening trays?
Whitening trays are thin, tooth-shaped carriers that hold a peroxide-based gel against the front and sides of natural teeth. A dentist can make them from an impression or digital scan. Shops also sell ready-made, moldable, and prefilled versions.
The tray does not bleach teeth on its own. It keeps the gel where it belongs for the time stated by the product or dental professional. A close fit helps prevent gel from spreading onto the gums, which can cause temporary white spots, burning, or irritation.
Do whitening trays work for yellow teeth?
Yes, whitening trays can lighten many yellow or brown external stains when the gel, fit, and wear schedule suit the person. They work best on healthy natural enamel with staining from drinks, food, tobacco, or normal aging. They do not change the shade of crowns, veneers, bonding, fillings, or implants.
Color change is personal. The starting shade, type of discoloration, gel formula, wear time, enamel condition, and daily habits all matter. A dentist can record a starting shade, check for problems that need care first, and help set a realistic goal.
| Question | Straight answer | Why it matters |
|---|---|---|
| Can a tray lighten natural teeth? | Often, yes. | Peroxide breaks down colored compounds within the tooth structure. |
| Can it whiten a crown or veneer? | No. | Porcelain and composite resin do not respond like enamel. |
| Does a stronger gel always create a better result? | No. | Higher strength may increase discomfort and is not right for every mouth. |
| Will every tooth change evenly? | Not always. | Old fillings, cracks, dehydration, and deeper discoloration can create differences. |
| Is a custom fit useful? | Usually. | It can improve comfort and keep gel away from soft tissue. |
Why teeth look darker or more yellow
Tooth color has two parts. Enamel is the outer protective layer; dentin beneath it has a naturally warmer tone. As enamel thins with age or acid wear, more of that warmer dentin can show through.
Surface staining can come from coffee, black tea, red wine, cola, berries, curry, tobacco, and colored mouth rinses. Internal discoloration can follow trauma, root-canal treatment, developmental conditions, or certain medicines taken while teeth formed. Bleaching may help surface and many age-related stains, while internal changes often need a dentist’s diagnosis and a different treatment.
A professional cleaning removes plaque, calculus, and surface buildup. It can make teeth look fresher, but it is not the same as bleaching. Start with clean teeth and healthy gums so you can judge the true shade and reduce avoidable irritation.
How peroxide gel changes tooth color
Most take-home bleaching products use hydrogen peroxide or carbamide peroxide. Carbamide peroxide breaks down into hydrogen peroxide and other components over time. The active oxygen moves through enamel and reacts with colored molecules, making them less visible.
That process does not sand enamel away when used as directed. Still, bleaching is an active chemical treatment, not a casual beauty step. A worn tray, a damaged tooth, or repeated overuse changes the risk picture.
Expect gradual improvement rather than one dramatic overnight shift. Your teeth can look temporarily chalkier straight after a session because they are dehydrated. Give the shade time to settle before deciding whether you need more treatment.
Types of whitening trays and how they differ
The best style is the one that fits your mouth, follows local product rules, and matches your oral-health needs. Cost alone does not tell you whether a tray will feel comfortable or deliver even coverage.
| Tray type | Fit and control | Best use case | Watch for |
|---|---|---|---|
| Dentist-made custom tray | Made from your own teeth; usually the closest fit | People who want a tailored plan or have sensitivity, recession, fillings, or uneven color | Requires an appointment and usually costs more upfront |
| Boil-and-bite tray | Softened then shaped at home | Short-term use when the fit becomes smooth and stable | Bulk, poor seal, and gel touching the gums |
| Universal ready-made tray | One general shape | Convenience for a brief trial, if it stays in place | Loose edges, uneven contact, and excess gel |
| Prefilled disposable tray | Gel amount is set by the manufacturer | Travel or simple single-use routines | Limited adjustment and a fixed shade plan |
Custom whitening trays are reusable when you clean and store them well. They also allow a dentist to adjust the trim line or review the fit after dental work changes. A shop-bought tray can be appropriate for some adults, but stop if it pinches, slips, or leaves your gums sore.
Dentist-supervised treatment versus over-the-counter kits
A dental visit adds diagnosis, not just a tray. The clinician checks for decay, leaking restorations, gum inflammation, exposed root surfaces, cracks, and the cause of the color change. That matters because gel can reach sensitive areas through defects that are easy to miss in a mirror.
Over-the-counter kits can suit a healthy adult with mild surface staining and no history of painful sensitivity. Read the package fully, including who should not use the product, how long to wear it, and how to store the gel. Local rules can limit which strengths are sold directly to consumers.
| Feature | Dentist-supervised plan | Over-the-counter kit |
|---|---|---|
| Mouth assessment | Included before treatment | User must arrange this separately |
| Tray fit | Made or adjusted for the individual | General fit or home-molded |
| Gel plan | Chosen for the person and product | Fixed by package directions |
| Support for sensitivity | A clinician can change the schedule or suggest care | Product instructions are the main guide |
| Follow-up | Shade and gum response can be reviewed | Self-monitored |
Who should use whitening trays and who should wait?
A healthy adult with intact teeth and stable gums may be a candidate after an oral-health check. The question is not only, “Can I buy a kit?” It is, “Is this the right approach for my tooth color and mouth today?”
Wait and ask a dentist before using whitening trays if you have any of these signs or situations:
- Toothache, pressure pain, a loose tooth, or a dark single tooth
- Cavities, chipped teeth, cracks, worn enamel, or leaking fillings
- Bleeding gums, swelling, active gum disease, mouth ulcers, or recent oral surgery
- Strong hot-and-cold sensitivity or exposed root surfaces
- Braces, fixed retainers, or extensive crowns, veneers, bonding, or front fillings
- A child or teenager whose teeth and gums are still developing
- Pregnancy or breastfeeding, unless your dentist or physician says a particular product is appropriate
- Discoloration after injury, a root-canal procedure, or a medicine-related color change
A dark tooth after an accident needs an examination, even if it does not hurt. Bleaching a tooth with an unrecognized problem can delay the care that protects it.
How to prepare for a safer whitening plan
Preparation gives you a calmer, more predictable experience. Do not start on the same day you notice gum bleeding or dental pain.
- Book an exam or recent checkup. Ask whether your teeth, gums, fillings, and desired shade are suitable for bleaching.
- Have cleaning needs addressed. Plaque and calculus can hide the real starting color and make gum irritation more likely.
- Choose one product plan. Do not layer strips, pens, lights, rinses, and trays at the same time.
- Record your start. Take a clear photo in the same natural light and note any sensitive teeth. A dentist may use a shade guide.
- Read every instruction before opening the gel. Wear time and storage differ between formulas.
- Plan around events. Start when you can pause if sensitivity appears instead of pushing through before a wedding or photo day.
A simple baseline makes progress easier to judge. It also helps you tell the dentist whether a new ache began before or after bleaching.
How to use whitening trays without making a mess
Follow your dentist’s instructions or the exact directions that came with your product. Do not copy a friend’s routine, because gel concentration and tray design may differ.
For many systems, the practical sequence looks like this:
- Brush and floss gently, then wait if your directions tell you to avoid immediate placement after brushing.
- Dry the tray if required. Put only the small gel amount instructed for each tooth space; more gel does not mean more whitening.
- Seat the tray carefully. Press it into place with clean fingers rather than biting down hard.
- Wipe away gel that escapes onto the gums with a clean tissue, cotton swab, or soft toothbrush, as the product directs.
- Wear it only for the stated time. Set a timer instead of guessing.
- Remove the tray, rinse your mouth, then rinse the tray in cool water. Hot water can warp plastic.
- Let it air-dry in its case and store gel as the label requires.
Do not eat, drink, smoke, sleep in the tray, or use the tray longer than directed unless your dental professional specifically tells you to. Keep gel away from children and pets. If you swallow a large amount, have severe pain, or develop swelling, contact a poison service or urgent medical provider in your area.
How much gel should you place in each tray?
Use the smallest amount that coats the visible tooth surface after seating. Many products instruct a tiny drop for each tooth compartment, but the package or dentist’s plan is the authority. Overflow is wasted gel and a common cause of gum irritation.
Do not refill a compartment because you cannot see gel through the tray. Clear gel can still contact the tooth. A dentist can show you the right amount during fitting; that brief demonstration can prevent days of discomfort.
How long should you wear a tray and how many days does treatment take?
The correct wear time depends on the specific gel, its concentration, and the maker’s directions. A dentist may set a different schedule based on sensitivity, tooth condition, and the target shade. Never extend wear time to chase a faster result.
Many plans run over days or weeks, with rest days when needed. The study by Meireles and colleagues followed at-home treatment of 10% and 16% carbamide peroxide for two hours a day across three weeks; both groups remained lighter at six months in that trial. That finding describes the study protocol, not a universal schedule for every gel or person.
If your teeth start to zing, stop for a day or longer and speak with a dentist if it continues. Progress that feels slow is safer than pain that makes you abandon the plan.
What sensitivity feels like and how to calm it
Short, sharp flashes from cold air, water, or biting can happen during bleaching. Mild gum tenderness can also occur when gel touches soft tissue. These effects often settle after you reduce exposure or take a break, but pain is information, not a challenge to overcome.
Try these sensible steps first:
- Pause treatment rather than adding another session.
- Use a soft toothbrush and gentle pressure.
- Choose toothpaste intended for sensitive teeth, following its label.
- Avoid very cold drinks and highly acidic foods for a day or two if they trigger pain.
- Check the tray for sharp, rough, or overextended edges; ask a dentist to adjust a custom tray.
- Use less gel next time, not more.
Stop and get dental advice promptly for severe, throbbing, lingering, or one-tooth pain; a chemical burn; gum swelling; rash; or a tray that no longer fits. These signs may point to something other than ordinary temporary sensitivity.
What to eat and drink while whitening
You do not need to fear every colored meal, but reducing strong staining exposures makes it easier to maintain the shade you earn. Your teeth may also feel more sensitive to temperature and acid during a course.
For the first day after each session, choose water and lighter-colored foods when practical. Limit tobacco, coffee, black tea, red wine, cola, dark sauces, and intensely colored berries. If you do have a staining drink, use a straw when appropriate, rinse with water afterward, and wait before brushing if the drink was acidic.
Keep normal nutrition and do not adopt a restrictive “white diet.” The bigger win is a repeatable routine: drink water often, clean between teeth, attend checkups, and avoid tobacco.
How long do whitening results last?
Results fade gradually because teeth continue to meet food pigments and natural color changes. In the Meireles randomized trial, both at-home carbamide peroxide groups still measured lighter than baseline at the six-month review. Your result can last a shorter or longer time depending on your starting shade, enamel, diet, oral hygiene, tobacco use, and dental care.
Use photographs taken in similar light to judge change. Bathroom lighting can make teeth look dramatically different from daylight. When you want a touch-up, ask a dentist how often it is sensible for your teeth and product rather than repeating a full course automatically.
Whitening trays and crowns, veneers, fillings, and implants
Peroxide can lighten natural enamel around dental work, but it does not recolor the restoration itself. If a front crown or filling matched your old shade, whitening can leave the restoration looking darker by comparison. Plan the order of cosmetic work with your dentist.
A common sequence is to whiten natural teeth first, let the color settle, then match new visible restorations to the stable shade. Do not bleach over a loose crown, a chipped veneer, or an area where food catches. That needs repair, not a cosmetic cover-up.
What affects evenness of the final shade?
Even results depend on more than the tray. Teeth vary in enamel thickness, previous fillings, mineral marks, surface wear, and stain depth. Canines often begin darker than front incisors, and a single injured tooth may respond differently from its neighbors.
The 2015 split-mouth study by Morgan, Jum’ah, and Brunton found similar shade change after two weeks with extended and conventional custom tray margins, using 10% carbamide peroxide. The useful lesson is not to chase oversized trays; a comfortable, correctly fitted design and a sensible gel routine matter more.
A dentist may suggest cleaning, smoothing a rough filling, treating a single dark tooth, or replacing a visible restoration after bleaching. These steps create a more natural-looking smile than trying to force every tooth to one flat shade.
Common whitening mistakes that slow progress
Small shortcuts create most avoidable problems. Protect your teeth and wallet by skipping these habits:
- Using extra gel or doubling sessions after missing a day
- Wearing the tray longer than the product states
- Treating through pain, bleeding, or sore gums
- Whitening before a dental exam when you have symptoms
- Combining several peroxide products at once
- Using hot water to clean the tray
- Leaving the gel in heat or sunlight when the label says to refrigerate or store cool
- Expecting a crown, veneer, or filling to whiten
- Sharing a tray with another person
- Comparing your teeth to heavily filtered photos
The 1996 randomized trial by Rosenstiel, Gegauff, and Johnston found a greater mean color change in the active home-bleaching group than in the placebo group after five consecutive nights, with no significant measured changes in pulp vitality, sulcus depth, or Gingival Index for the treatment group over the study period. That is reassuring within that controlled study; it does not make unsupervised overuse safe.
How to choose the right whitening product
Use this decision checklist before you spend money:
- Start with your mouth, not the advertisement. If you have pain, bleeding, cracks, or lots of visible restorations, book a dental visit first.
- Identify the active ingredient and follow its label. Avoid products that hide basic use directions or make instant, permanent promises.
- Choose fit over gimmicks. A comfortable tray that stays in place is more useful than an accessory you will not wear correctly.
- Pick a pace you can follow. A lower-stress schedule with rest days is better than a rushed routine that causes sensitivity.
- Check how you will maintain the result. Ask whether refills, touch-ups, and replacement trays are available and appropriate.
- Buy from a reputable dental practice, pharmacy, or established retailer. Clear safety information and a way to ask questions are worth more than a dramatic before-and-after image.
For a first course, whitening trays from a dentist offer the clearest route when you have past sensitivity, uneven tooth color, exposed roots, or cosmetic dental work. They may cost more, yet the assessment and fit can prevent an expensive mistake.
Cost: what you are paying for
Prices vary by location, tray type, gel supply, dental assessment, and follow-up. A low shelf price may not include a checkup, custom fitting, cleaning, or help if sensitivity appears. A dentist-made plan often includes more of those steps, while shop kits can have a lower initial cost and less personal guidance.
Ask for a written breakdown. It should state whether the price covers the exam, impressions or scan, trays, gel, shade review, adjustment visits, and future refill options. The best value is a plan that protects oral health and gives you a result you can maintain.
How a dentist creates a custom tray
A dentist or trained dental team starts with an exam and records your current shade. They take an impression or digital scan, make a model of your teeth, and form a thin plastic tray that follows the arch. The edges are trimmed so the tray seats comfortably without digging into the gums.
At the fitting appointment, the clinician checks retention and shows where to place the gel. They may adjust the plan for sensitive teeth or arrange a review. Keep the case, because a well-maintained tray may be used later for dentist-approved touch-ups if your teeth and dental work remain suitable.
How to clean and store your tray
Rinse your tray with cool or lukewarm water after use. Use a soft toothbrush without abrasive toothpaste if residue remains, then allow the tray to dry fully in its protective case. Heat can distort thin plastic, so keep it away from hot dashboards, radiators, dishwashers, and boiling water.
Store gel exactly as the manufacturer says and check the expiry date. Do not use a cloudy, leaking, discolored, or expired product. Bring the tray to routine dental appointments so the team can check its condition and fit.
Can whitening trays damage enamel?
When a suitable peroxide product is used as directed on healthy teeth, whitening trays are not intended to abrade enamel. The bigger practical risks are sensitivity, gum contact, treatment of undiagnosed decay or cracks, and overuse. Enamel damage can also come from brushing aggressively after acidic drinks or using harsh DIY abrasives, neither of which improves a bleaching plan.
Protect your enamel with fluoride toothpaste, gentle brushing, water after acidic drinks, and regular dental care. Do not try charcoal powders, undiluted peroxide rinses, lemon juice, or household chemicals in place of a dental product. They can irritate tissue or wear surfaces without giving predictable whitening.
Frequently asked questions about whitening trays
Do whitening trays work better than whitening strips?
Short answer: They can, especially when a custom tray fits well.
Trays can hold gel against more of the tooth surface and can be reused with a dentist-approved plan. Strips are simpler and may suit mild staining, but they can shift and may not cover every tooth evenly. The better option is the one that fits, feels safe, and matches your dental needs.
How often can I use whitening trays?
Short answer: Use them only on the schedule for your exact gel or from your dentist.
There is no safe one-size-fits-all frequency. Your teeth may need rest days, and repeated courses without a review can increase sensitivity or create mismatched dental work. Ask for a touch-up plan once your desired shade is stable.
Why do whitening trays make my gums turn white?
Short answer: Gel likely touched the gum tissue.
A temporary pale patch can occur after peroxide contact, but it should not be ignored. Remove the tray, rinse, use less gel next time, and check the fit. Seek dental advice if the area is painful, ulcerated, swollen, or does not settle.
Can I sleep while wearing whitening trays?
Short answer: Only if your exact product and dental professional specifically say so.
Wear time differs widely among formulas. Sleeping in a tray that was designed for a shorter session can expose teeth and gums to gel for too long. Follow the directions that came with your product, not a generic internet routine.
Will whitening trays whiten a single dark tooth?
Short answer: Not reliably, and a single dark tooth needs a diagnosis first.
Trauma, a dying nerve, old root-canal treatment, or internal staining can darken one tooth. A dentist may recommend internal bleaching or another treatment after checking the tooth. Do not mask a sudden color change with a home kit.
What should I do if I get sharp pain after whitening trays?
Short answer: Stop using them and arrange dental advice if pain is severe, localized, or does not fade.
Take a break for mild generalized sensitivity and avoid triggers such as ice-cold drinks. A sharp pain in one tooth can signal decay, a crack, gum recession, or another condition that bleaching did not cause but may have exposed. Get urgent help for swelling, fever, facial spreading pain, or trouble swallowing.
Take the next safe step
A brighter smile starts with a healthy mouth and a plan you can follow without pain. If you have healthy teeth, clear instructions, and a tray that fits, whitening trays can be a useful option for gradual, natural-looking improvement. If you have sensitivity, dental work, bleeding gums, or a dark single tooth, schedule a dental assessment before you bleach; the right diagnosis protects both your smile and your confidence.