Mixamo: The Complete 3D Animation and Rigging Guide
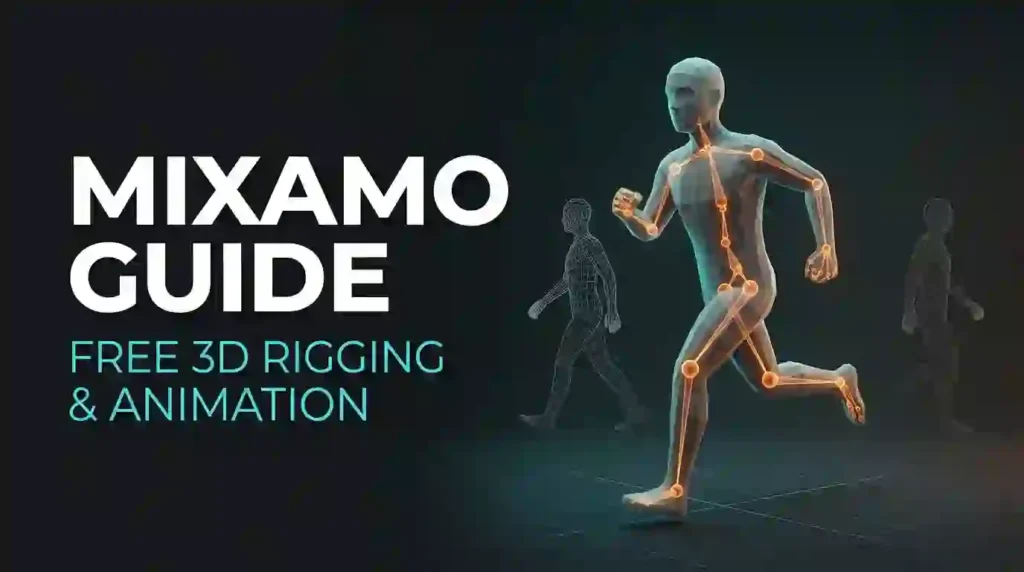
Your finished 3D character sits in the viewport, perfectly textured, completely still. Rigging it by hand costs a weekend of weight painting. Mixamo removes that weekend. You upload the mesh, place five markers, and download an animatable skeleton plus motion-captured clips in about four minutes, and this guide covers every setting that matters, the licensing rules nobody reads, and the retargeting steps that keep clips clean in Unity, Unreal, Godot, and Blender.
What is Mixamo and what does it actually do?
Mixamo is a free browser service owned by Adobe that rigs humanoid 3D characters and applies motion-captured animation to them. No install, no license file, no plugin to babysit. You work on a website and you leave with an FBX.
It does two jobs. First, it builds a skeleton and skin weights for a humanoid mesh you already made. Second, it hands you a library of roughly 2,500 animation clips that retarget onto that skeleton.
That is the honest scope. It does not model characters for you. It does not build facial rigs. It does not export Alembic or USD. Treat it as a rigging and motion service, not a full animation studio.
Adobe acquired the product in 2015 and folded it into Creative Cloud as a free web service. The library stopped growing years ago, and that turns out to be fine, because the clips it shipped are the boring ones every project needs.
Here is what you get in one sitting.
- An auto-rigger that binds a standard humanoid skeleton to your mesh in under a minute
- Around 2,500 animation clips covering locomotion, combat, sports, dancing, and gestures
- A character library of several hundred ready-made humanoids
- FBX and Collada export, with or without skin, at 30 or 60 fps
- Royalty-free use in personal, commercial, and non-profit work
Is Mixamo free, and what is the real catch?
Yes, and the catch is small. Adobe states plainly that the service is available free to anyone with an Adobe ID and requires no Creative Cloud subscription. There is no watermark, no clip limit, and no export quota.
Three restrictions are worth knowing before you plan a project around it.
- Enterprise IDs and federated Adobe IDs cannot open the site
- Accounts with a China country code do not get access
- The site stores only your last used character, so nothing replaces saving files locally
That last one bites people. Rig six characters on a Friday, come back Monday, and the site shows you the sixth one only. Download every rigged character the moment it finishes and keep an FBX folder you control.
Who should use it, and who should skip it?
Use it when motion matters more than polish. A prototype needs a walk cycle today, not a beautifully keyed one next month.
Strong fit:
- Indie game developers filling out a greybox build
- Technical artists validating mesh deformation before committing to a hand rig
- Motion designers, educators, and storyboard artists making previz
- 3D printing hobbyists and machinima creators
- Anyone learning animation principles who needs reference poses to study
Weak fit:
- Creatures, quadrupeds, vehicles, and props, since the rig is humanoid only
- Studio production pipelines that need a control rig, custom naming, and version history
- Close-up hero shots where a character looks straight into the camera
Why do searches for “maximo” and “mixoko” lead here?
People type fast. Searches for maximo, mixoko, and mixamo animation all describe the same browser tool, and search engines treat them as one intent rather than three separate topics. That is helpful news for you, because it confirms what matters here is the task you are solving, not the spelling you used to find it.
The name confusion runs deeper than typos. Maxon makes Cinema 4D, and Mixamo is an Adobe service, so a search for “maximo 3d” often means two different products. Type “mixoko” into a store and you get nothing.
Here is how to tell the tools apart in one line.
- Mixamo: free browser rigging and humanoid animation clips
- Maxon Cinema 4D: a full 3D modeling, motion graphics, and rendering suite
- Mixkit: no 3D rigging, free stock music, video, and sound effects
- Mixamo Auto-Rig: the marker-based skeleton builder inside the site
Search engines match on meaning and on the entities around a word. That is also why the rest of this page names specific things: file formats, joint names, engine settings. Vague copy ranks for vague queries.
How does the auto-rigger work, step by step?
The Mixamo auto-rigger runs in five steps, start to finish. Follow them in order and you will rarely redo anything.
- Open the editor after logging in with your Adobe ID.
- Click Upload Character and pick your FBX, OBJ, or ZIP file.
- Place the five markers on the chin, both wrists, the groin, and the left elbow.
- Wait while the service builds the skeleton and paints skin weights.
- Press Download for the rigged character, then Find Animations for clips.
Step three decides your whole result. The markers tell the system where joints live on a body it cannot truly understand. Place them on anatomy, not on geometry that merely looks right from your camera angle.
Spin the model before you accept a marker. A chin marker that sits on the jawline instead of the chin tip pulls the head bone through the neck and gives you a rubbery turn.
What are the upload rules that cause 90% of rigging failures?
Adobe publishes a short list of requirements, and almost every failed upload I have seen ignored one line from it.
Run this checklist before you touch the upload button.
- One character in the file, nothing else
- Cameras, lights, locators, reference meshes, and helper curves all deleted
- Model centered at the world origin so engine offsets do not creep in
- Neutral T-pose or A-pose, symmetric, with transforms applied
- Clean connected mesh, so no floating head or detached glove
- No oversized props, wings, tails, or heavy hair attached to the body
- Textures embedded in the FBX, or packaged in a ZIP for OBJ
Format support is narrow on purpose. FBX and OBJ are the two native options, and a ZIP bundle works when an OBJ needs its MTL file and texture maps with it. A bare OBJ uploads gray because the viewer has no texture path to follow.
Clothing is the usual heartbreak. A coat modeled as a separate shell, hovering a centimeter off the body, confuses binding. Weld it to the mesh, or export it as a second node and parent it to a bone in your engine instead.
How do you place auto-rigger markers correctly?
The auto-rigger asks for five points, and each one anchors a joint cluster.
- Chin: the bottom tip, not the middle of the face
- Wrists: the crease where hand meets forearm, both sides
- Groin: the point where the legs meet the torso
- Left elbow: the outer joint crease
Two rules do most of the fixing. First, work from a straight-on orthographic view when you place wrists and elbows, because perspective exaggerates depth. Second, zoom in. Markers snap to nothing, so a sloppy click stays sloppy through every animation you export.
If your character has a wide helmet, big pauldrons, or a stylized head, place the chin marker where the actual jaw sits. The rig cares about the skeleton, not the silhouette.
Which animations are in the library?
Browse by category and the catalog makes sense fast. Coverage is uneven in a useful way, because the heavy categories are the ones you need most.
| Category | Typical clips | Where it shines |
|---|---|---|
| Locomotion | walking, running, strafing, turning, jogging stops | base movement for any playable character |
| Jumping and falling | short jump, long jump, tuck roll, ragdoll recovery | platformers and action games |
| Combat | sword slashes, punches, kicks, blocks, death reactions | melee prototypes and previz |
| Dancing | hip hop, salsa, breaking, group routines | music videos and stylized scenes |
| Gestures and conversational | shrug, point, nod, agree, thinking poses | dialogue blocking and previz |
| Sports and recreation | basketball shots, golf swing, soccer kick, skating | animated sports sequences |
| Standing and idle | relaxed idle, leaning, fatigued breathing | filler loops between actions |
| Sitting and lying | chair sit, floor sit, get-up, prone | environmental interaction |
| Falling and getting up | stagger, recover, knee land | hit reactions |
| Climbing and crawling | ladder, wall climb, crawl forward | stealth and level traversal |
Two practical notes. Every clip plays on the same shared skeleton naming, which is exactly why retargeting between characters stays easy. And you can trim length, adjust speed, and mirror a clip in the browser before you ever download it.
What export settings protect your skin weights?
The Mixamo download panel hides a few choices that cause real rework later. Here is the set I use, and why.
| Setting | Options | Default choice | Reason |
|---|---|---|---|
| File format | FBX Binary, FBX ASCII, Collada (.dae), .bvh | FBX Binary | carries skin, textures, and scale reliably |
| Skin | With Skin, Without Skin | Without Skin for extra clips | one skinned mesh, then lightweight animation-only files |
| Frames per second | 30, 60 | 30 for gameplay | half the keyframes, still smooth at speed |
| Key reducer | off, low, medium, high | low or off | high smoothing flattens foot contact frames |
| Split by node | on, off | off | one node means one import pass |
| Custom color | on, off | on | makes selection easy in a crowded scene |
The rule people learn the hard way: download the rigged character once with skin, then pull every additional clip without skin. Re-importing a fresh skinned mesh for each animation doubles your file size and starts a naming war in your engine.
How do you retarget Mixamo animations in Unity, Unreal, Godot, and Blender?
Retargeting is where motion stops being a download and becomes gameplay. The good news is that the shared skeleton makes the same trick work almost everywhere.
| Engine or tool | Rig setup | Retarget method | Common gotcha |
|---|---|---|---|
| Unity | Humanoid avatar | Mecanim muscle mapping | clips arrive named after the site; rename on import |
| Unreal Engine | any skeleton | IK Retargeter or a shared skeleton | source and target bone names must map explicitly |
| Godot 4 | Skeleton3D | community Mixamo retarget plugin | prefix mismatch on manual import |
| Blender | armature | Mixamo Rig extension or manual FBX | 0.01 scale and the mixamorig prefix |
| Maya | HumanIK | character set plus retarget | control rig does not survive FBX |
For Unity, drop the FBX in, set Animation Type to Humanoid, and let the avatar mask do the work. Multiple clips import as a single take when you downloaded with skin, so split them into separate files or use an editor script to rename each clip on import.
For Unreal, the modern route is IK Retargeter. Create an IK rig for your character and another for the incoming source skeleton, then map the bones once. Every future clip reuses that rig and the mapping stays.
For Blender, expect three fixes on manual import: set the scale factor to 0.01, delete the extra armature the file carries, and rename the bones if your addon expects clean names. Community extensions handle all three automatically.
What are the most common problems and quick fixes?
- The upload fails with no clear error. Remove every other object from the scene, apply transforms, and re-export. A stray camera is enough.
- The rig has an extra arm on its back. A backpack or cape confused bone detection. Delete the prop, rig the body, and parent the prop to a bone later.
- Feet slide through the floor. Key reducer was set too high. Re-export at low or off and bake contact frames in your engine.
- The character imports at giant or insect scale. Different unit assumptions. Set your importer to 0.01 in Blender, or use 100 percent in Unity’s scale factor.
- The mesh looks fine but stretches at the shoulders. Auto-painted weights missed. A ten-minute manual weight paint pass fixes most stylized characters.
- Every clip plays in place. Turn off “bake into pose” when you want root motion, and keep it on when your engine drives movement.
- The site loads but the rigging bar stalls. Clear the browser cache, switch to Chrome or Edge, and upload a file under 100 MB.
- Your account cannot open the site. Enterprise and federated IDs are excluded. Use a personal Adobe ID.
Most of these cost a minute to check and an afternoon to ignore. Fix the export settings first, then the mesh, then your importer.
What is the Mixamo license and can you sell the work?
This is the question I get asked most, and the answer from Adobe is refreshingly short. Characters and animations are both royalty-free for personal, commercial, and non-profit work. Adobe lists film, video games, illustration, graphic art, and 3D printing as permitted uses.
A few plain-English boundaries follow from those terms.
- You may ship a game with animated characters and charge money for it
- You may use clips in a client paid advertisement
- You may not resell the raw animations or characters as your own asset pack
- You may not present the characters as a brand identity or logo
- Redistribution of the library itself stays off the table
One practical risk lives outside the license. The service is free and unmaintained, so build your pipeline so that losing access does not stop production. Keep copies of every clip you actually use, in your repository, with your project.
How does it compare with other animation tools?
Mixamo wins on price and setup time and loses on range. That trade-off is the whole story.
| Tool | Cost | Non-humanoid support | Custom motion | Best at |
|---|---|---|---|---|
| Mixamo | free with an Adobe ID | no | no | instant humanoid clips and fast rigging |
| Rokoko Video | free tier for browser capture | no | yes, from webcam or video footage | capturing your own performance |
| Cascadeur | paid, free starter tier | yes | yes | keyframe assistance and physics posing |
| Autodesk MotionBuilder | subscription | yes | yes | professional mocap cleanup |
| Engine-native retargeting (UE5 IK Retargeter) | free with the engine | yes | no | moving any humanoid clip onto your rig |
The smart setup is not either/or. Use the free library for the hundred clips that carry a project, then capture or author the three hero animations the library cannot give you.
How does the service fit into a Blender to engine pipeline?
Here is the route I use on small teams, because it survives an engine swap.
- Block out the character in Blender and export a clean FBX with textures embedded.
- Upload it, place the markers, and download the rigged character with skin.
- Reopen it in Blender, fix shoulder and hip weights, and save that as your master file.
- Download the twelve clips the prototype needs, without skin.
- Retarget in Blender with an extension, then export one FBX containing an animation per track.
- Import into your engine once and build the state machine from those clips.
Step three matters more than it looks. Correcting weights in Blender gives you something no auto-rigger can promise: a file you own and can re-export forever.
What are the best practical uses beyond games?
- Previz for film and animation students, since a blocked scene with real motion reads instantly
- Product demos where a person holding a phone sells better than a floating phone
- Classroom animation lessons, because students compare their keys against captured motion
- VTuber and avatar testing before committing to facial tracking
- Posed reference for 2D artists who need weight and silhouette fast
- Storyboards, animatics, and pose studies
One detail sells this list. Motion carries intent. A shrug, a lean, a step back. The library has all of them, and a still render with good staging beats a perfect render with a rigid pose.
What limits will you hit, and how do you plan around them?
The auto-rigger supports bipedal humanoids only, and Adobe is explicit about it. Animals, vehicles, and creatures will not rig, no matter how you pose them.
The bigger structural limit is the workflow itself. Upload, wait, download, repeat. There is no cloud project, no version history, no multi-character scene. For a ten-character game that is a lot of browser tabs.
Plan around it with three habits.
- Keep a local rig archive with one folder per character and one FBX per clip
- Name every export the moment it lands, not at the end of the sprint
- Standardize on the shared skeleton naming so new characters inherit your retarget setup
Five pro tips that save hours
- Rig a generic body first, then swap your hero mesh onto that skeleton later if your art is messy.
- Download walk, run, and idle before anything else. If those three feel right, the rest of the set follows.
- Trim a clip to its strongest 40 frames. Library clips often run long, and long clips kill game feel.
- Layer a hand-keyed arm override on top of a library leg cycle. Two seconds of work and the motion stops looking stock.
- Export a clip pair, walk-to-run, and check the blend in your engine before downloading the other sixty clips.
Your 14-day plan from empty folder to moving character
Do these in order and you will finish with a working prototype rather than a folder of tutorials.
- Day 1: make or pick one humanoid mesh and pass the upload checklist
- Day 2: rig it, download with skin, and inspect deformation from every angle
- Day 3: fix shoulder and hip weights in Blender
- Day 4: pull locomotion clips and import them into your engine
- Day 5: build an idle-to-walk-to-run state machine
- Day 6: add turning and stopping, and remove foot slide
- Day 7: add one interaction clip, like a sit or a jump
- Day 8: retarget one clip onto a second character with different proportions
- Day 9: capture one custom motion with webcam mocap and blend it in
- Day 10: trim every clip to game length and cut keyframe count
- Day 11: add camera motion to a previz shot of your best sequence
- Day 12: write a one-page pipeline note so the next character takes half the time
- Day 13: test the build on target hardware and check animation memory
- Day 14: ship the clip set, then archive your rig
Frequently asked questions
Is Mixamo safe for commercial projects?
Yes. Adobe’s own licensing FAQ states that both characters and animations are royalty-free for personal, commercial, and non-profit projects, including films and video games. Reselling the raw assets as an asset pack is the part you cannot do.
Can you rig animals or creatures with it?
No. The auto-rigger and the animation library target bipedal humanoids only. Animals, quadrupeds, winged creatures, vehicles, and props are unsupported, so plan a hand rig or a dedicated creature tool for those.
Why does the character look broken after import into Blender?
Three usual causes: unit scale, duplicate armatures, and the bone-name prefix. Import at 0.01 scale, delete the extra armature the file brings in, and rename bones if your retarget addon expects plain names. Fix all three and the import behaves.
Do you need a Creative Cloud subscription?
No. An Adobe ID is enough, and that account is free. Enterprise and federated IDs are the exception, and Adobe excludes them from this service.
Can you use your own animations on the auto-rigged character?
You can export from it rather than import into it. The rig uses a standard humanoid skeleton, so any clip you bring in must be retargeted to that skeleton in Blender, Maya, or your engine first.
Is the Mixamo auto-rigger better than manual rigging?
For speed, yes. A bind in a minute versus hours in Maya. For control, no, because you get a bind-only skeleton without a control rig, and stylized characters often need a manual weight pass. Most teams use it for blocking and prototypes and hand off hero characters to a rigger.
Start rigging today
You now know more about this pipeline than most people who have used it for a year. The rules fit on one page: clean humanoid mesh, markers on real anatomy, one skinned export, animation-only exports after that, and retargeting handled once per engine.
So skip the plan. Take the character you already finished, run the upload checklist, and rig it tonight. Then pull a walk cycle and watch your own mesh carry weight for the first time.
Send me the link to your rig or drop a screenshot of your marker placement and I will tell you exactly which weight to fix. If your next question is about creatures, hand rigging, or mocap cleanup, pick that topic next and I will build the same kind of guide around it.